
White label landing pages are important to show your prospects and clients your differentiation, your edge. When it comes to discovery process or the questionnaires or workshops, everything depends on the business context. Why do we do that? What is the reason behind a service? Landing pages can explain what's going to happen in preparing for the Quarterly Business Review, or tell a story and describe the benefits to a prospect who's undecided whether to spend time with you.
Hint: A well customized landing page giving the client a good reason to spend 10-15 minutes on a questionnaire can make or break your effort. That's why it's vital to create as many landing pages with as much business context you can around the questionnaires. One for the QBRs, one for the Annual Strategy Planning meetings, one for the prospects and one for the website visitors. More focus means better conversion.
Set up a Landing Page
Creating a new landing page can be done from scratch or by copying an existing one. After we complete the details on the Landing Page editor, we can download the special javascript snippet to we can include on our website. Then when we create a new questionnaire we can select any landing page and the questionnaire will be directed to it.
Let's go through step by step:
1. First step is to create the new landing page.
On the screen you can see many options and the important settings:
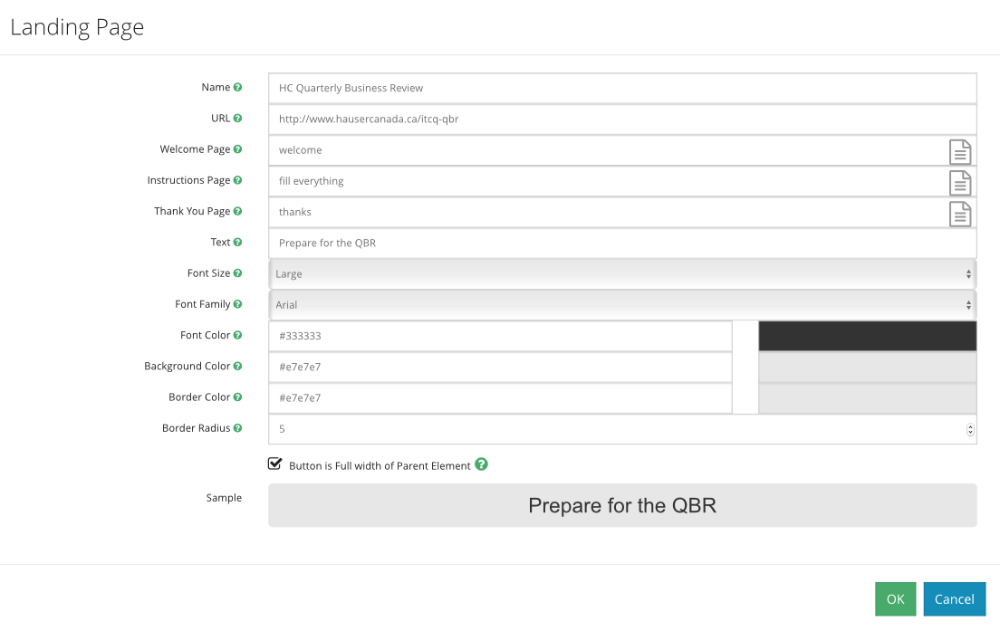
Name - Let's give the landing page a name - nobody else is going to see it, so make it relevant to you.
URL - this is important. This is the URL which will be generated when we create a new questionnaire. You actually have to have a real webpage on this address with our javascript code (which we discuss later). Choose a URL that will be visible to the recipients.
Welcome Page - is the text that's going to be seen by the client after clicking the button. It's an HTML box, where you can upload a picture or a YouTube video, for awesome effect.
Instruction Page - is usually the second page, used for explaining the process, logistics, time commitment and how to answer the questions.
Thank You Page - will be visible after completing the questionnaire. It's used for explaining the next step, what to expect and so on.
Text - This is going to be the text of the button. Based on button size and font size the text length can be different.
Font Size - small/medium/large fonts can be on the button.
Font Family - choose a font family best suited to your website.
Font/Background/Border Colour - make the button match your site design
Border Radius - 1-4 is quite sharp but from 5-10 you can create nice rounded edges to your button. Again try to match to overall look and feel of your site.
You can make the button full width to keep a nice look if you use bigger fonts.
If you're ok with it, save it!
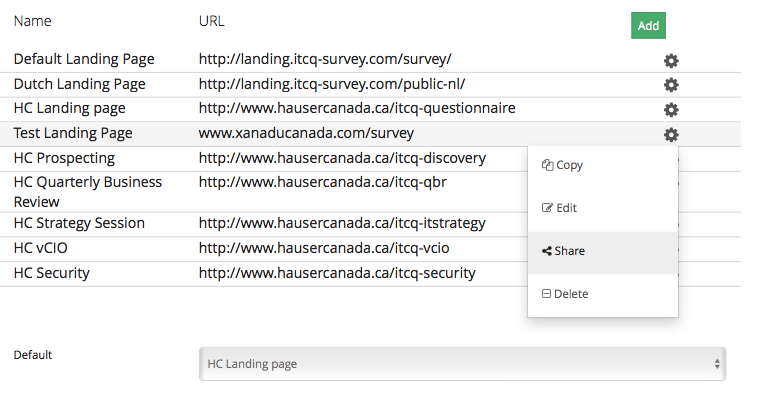
2. Now we can create the landing page on our site and embed the code
Just click the cog and the share button to be able to download the special code.
You are going to get a code like this: <script type="text/javascript" id="ryc-insert-script" src="https://tool.reframeyourclients.com/js/insertfill.js?landingPageId=58"></script>
Each of your landing pages has a different ID, so you have to look for each one. Now locate your landing page and include the script where you'd like to see your button. If you have a web designer company, just send them the code and they can take care of it.
Make sure you create a matching questionnaire to test out the script, because if you don't have the token on the URL the button will be there, but clicking it will only generate an error message.
There are a few new-wave website content management systems which don't allow putting scripts directly onto the site. For these you may have to play a little before you can make it work. If you're puzzled, let us know and we'll try to help.
If you're ready you should see your button on your website at this point.
3. Create a questionnaire and test the landing page
Go to the Discovery Process and launch a new questionnaire. When you see the pop up, choose one of your white label pages.

Once you've created the questionnaire you can share it or invite clients.
In both cases you should see the white labeled landing page URL and the questionnaire ID together.
For Sharing:

For inviting:
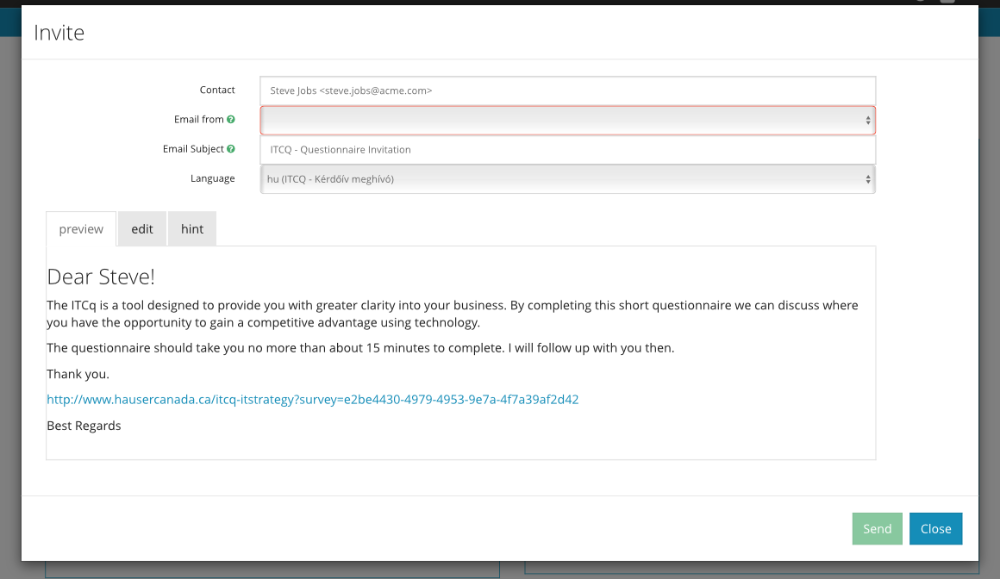
Clicking these URLs will open up your landing page on your website, and with the embedded script there will be a button on the page. Because the token has been passed with the URL the script will identify the questionnaire and open up the welcome page.
Screen: Take me to the Calls to Action screen