
COVID-19 Remote Work Self Assessment tool
A Grader is a mini survey that quickly gives a special report back to the respondent. We can use it to capture leads on our site, to qualify our prospect and client lists more precisely, or to create interest in a particular subject based on our client base.
Graders is your template library where you'll be able to get pre-built templates from the public templates and then use them in client communication.
You can create a new grader template by clicking on the plus sign “Add Grader“ box at the top of the contact list. When creating a new grader template, you're able to select one from the public grader templates and then completely customize it in terms of design, content, and context on the Edit Grader wizard.
You'll be able to customize them later by clicking on the name of the grader. In addition, using the icons on the right side of the grader boxes allows you to copy, share, check statistics or delete them.
Grader boxes show the basic stats of the survey: how many times has the survey started and finished.
Edit Grader
Let's use for some name conventions for the graders. You can use some for lead generation, some for sending it before meeting and some for test purposes. Stay organized from the start and the rest will flow.
Report Section
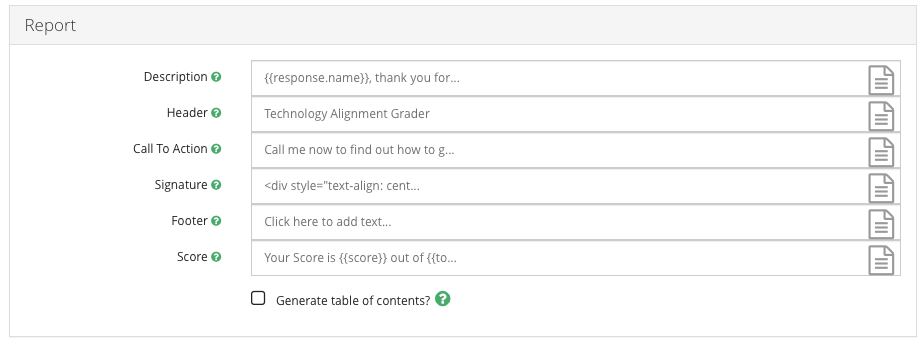
This section controls the content that's going to be in the report. The report is going to be generated automatically and all details can be managed from here.
Description - this section is going to be the first thing your prospects see in the report. The purpose is to give them context, and an introduction - a first impression. You can use pictures and HTML to control this part. You can use built in variables or custom variables to make the report more personal.
Header - the report has a header you can populate with your company name, your name or variable fields like the respondent's name. The header is going to be shown in every page on the PDF report, and won't be part of the HTML report.
Call To Action - this section is going to be at the bottom of the report. The goal is to initiate a next step, like a phone call, or set up a meeting for further investigation or whatever action you'd like them to take.
Signature - this section is going to be the last section right after the Call To Action, to sign off and add a personal touch.
Footer - the report has a footer you can populate with your company name, your name or variable fields like the respondent's name. The footer is going to be shown in every page on the PDF and won't show in the HTML report.
Score - this section explains the score. Make sure you put the score variables here to indicate the results behind the gauge.
Generate Table of Content - this checkbox lets you include a Table Of Contents in your grader. Especially with the larger graders, it's a good idea to give an overview before they jump into the report.
Report Design

This section lets you customize the look and feel of the grader reports. We give you easy to adjust basic features here.
Font - you can choose font size and style to make the overall text similar to what you have in your own website. Always be consistent!
Colors - you can adjust the colors of the various <H1>...<H6> sections, which you can select on the HTML editor.
Chart Score Colour - adjust the look and feel of the donut chart.
Questions
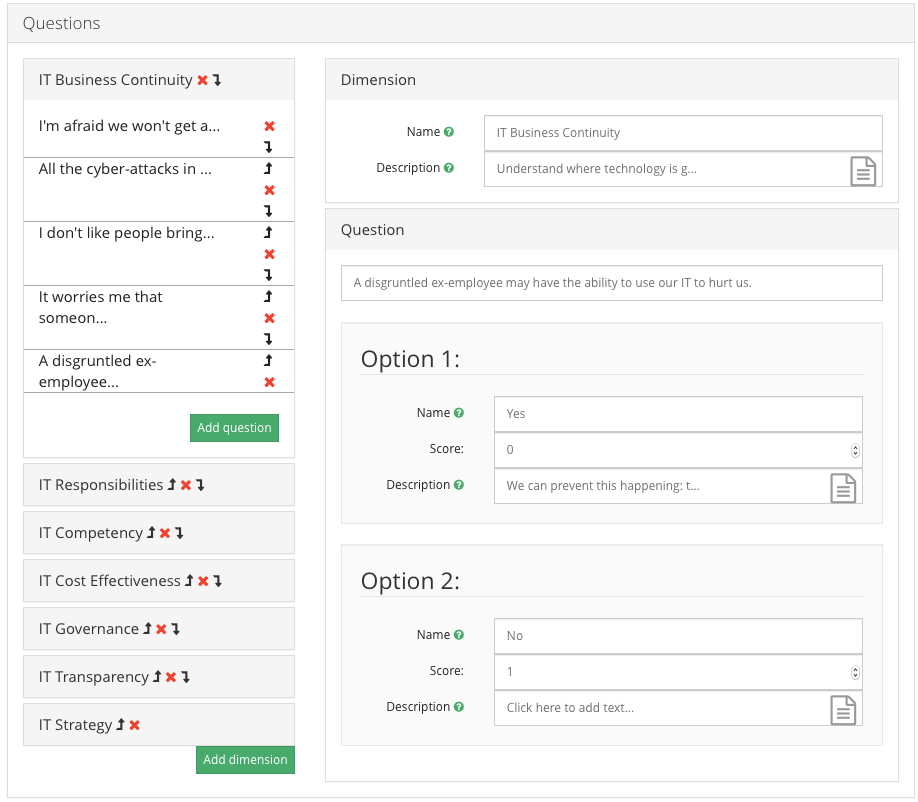
The Questions section is where you control the different dimensions, questions, scores, descriptions and the report recommendations.
Add/Edit Dimension - you can add a dimension here. A dimension will be a page when the prospect completes your grader. If you want to break down your questions for various sections, just use multiple dimensions.
Dimension Name - The name appears on the questionnaire's header and on the report
Description - the text goes to the report right after the Dimension text. It helps you elaborate on the section if you feel the need.
Add/Edit Question - you can add alternative response items to the survey here. The alternative response item consists of a declarative statement which allows respondents to choose between two comparable answers, one correct and the other wrong. A question has to be in a dimension. You can move any question up or down in the order of each dimension.
Options - considering the alternative response item, there are two options: one is correct and the other is wrong.
Question Name - the name of the option will appear after the radio button on the survey
Score - is either zero or one, and gets added to the overall score. The positive answer usually gives one point and the negative answer where we have to take action scores zero. You are not able to give more than 1 point as a score.
Description - the description will be the text shown on the report based on the selection they made. If they have chosen option 1 then they are going to get the Description text under option 1. You are able to include rich media, variables and anything else you like to get your idea across.
Fill

The fill part is where you control what the client sees before starting the questionnaire, and after they finish it.
Preface - text will be shown to the client after clicking on the Start Survey button. It will be in a pop-up and is used to welcome and instruct the client in how to complete the survey.
Thank You - the text will be visible after they've completed the survey - usually used for giving instructions on next steps, like setting up a meeting, or checking the inbox.
Analyze

The Analyze section is where you set up the thresholds for the various score ranges. The results falling into these different thresholds will let you select different recommendations based on the score range they reach.
You can create multiple thresholds and customize additional responses for the results.
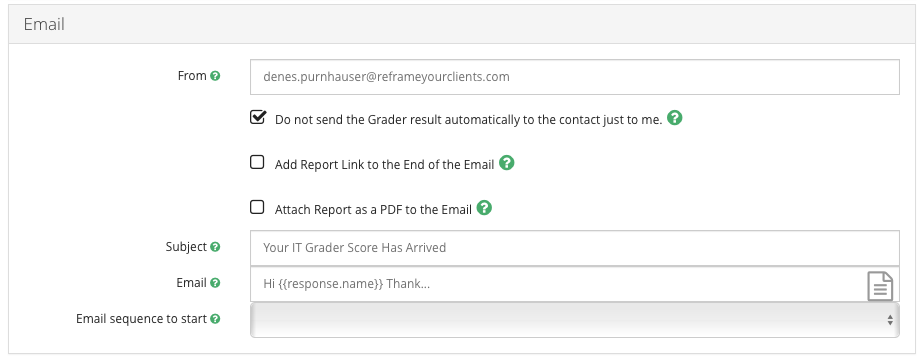
After completing a grader, the respondent is sent an automated email on your behalf.
Warning: Make sure you set up the email profile here to ensure the emails actually get delivered. If you don't, there is a chance your emails will land in their spam folder.
From - whom you want to be listed as the sender of the email.
Do not send the Grader results automatically to the contact, Send Result Only for Me - checking this box will prevent the tool sending any email. It is used only when you want to withhold the report for a meeting or a phone call to personally discuss.
Add Report Link to the End of the Email - will add the report HTML link to the end of the email body.
Attach Report as a PDF to the Email - will add the PDF report to the email as an attachment.
Subject - the subject of the email. Feel free to use variables like to insert your client's name into the subject line.
Email - will be the body of the email in HTML format. Feel free to use signatures and other variables.
Email Sequence to Start - we have an option to choose one of our email sequences to start sending nurturing campaigns after they completed the survey. It may consist of more information, drip email or more calls to action emails.
CTA Button Design
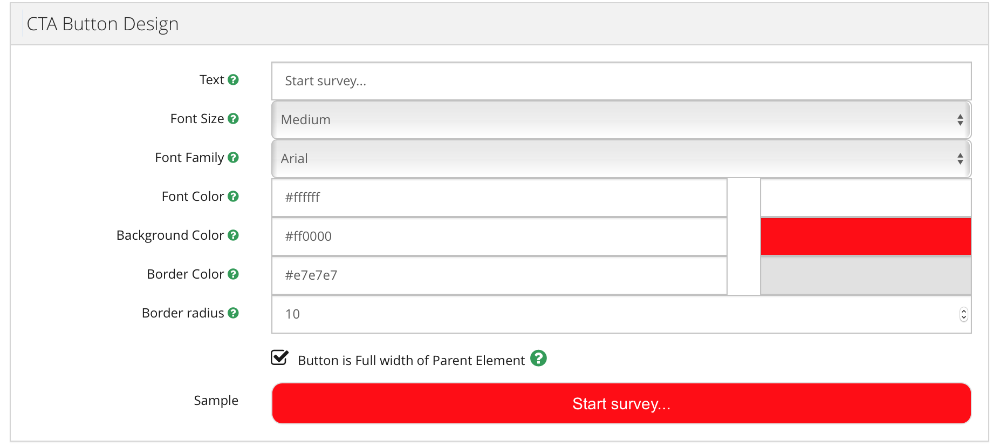
This section gives you options to custom design the button that starts the grader survey.
Text - the text on the Calls To Action button.
Font - you can change font, size and colour.
Colour - change the button and border colours.
Border radius - make rounded or square buttons to suit your website design.
Button is Full width of Parent Element - you can make longer buttons based on your website sections to customize it on your site.
Variables
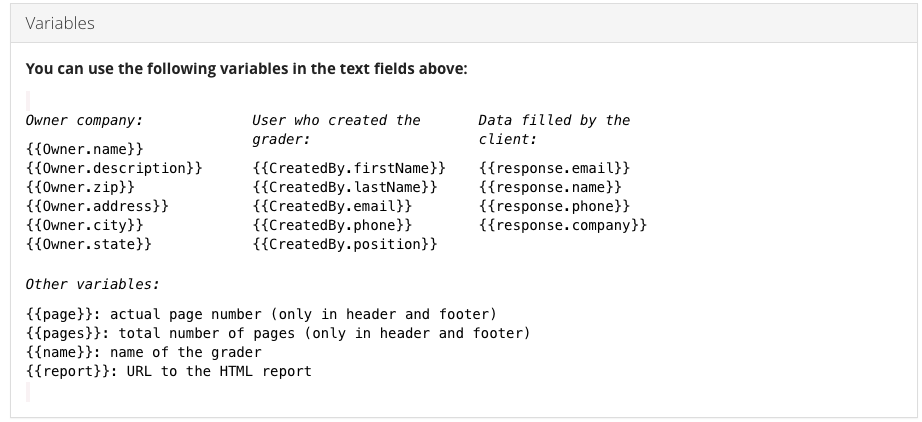
You're able to include variables into the different sections of the Grader Report and Email.
This helps you make the experience more personalized for your clients.
Preview
Clicking to the Preview buttons will generate a report with random scores in either HTML or PDF format.
Screen: Take me to the Graders screen