
Step-by-Step walk-through on how to add gauges to your report
In order to be able to embed BrightGauge gauges to your reports you need to have the Public Gauges feature enabled on your account.
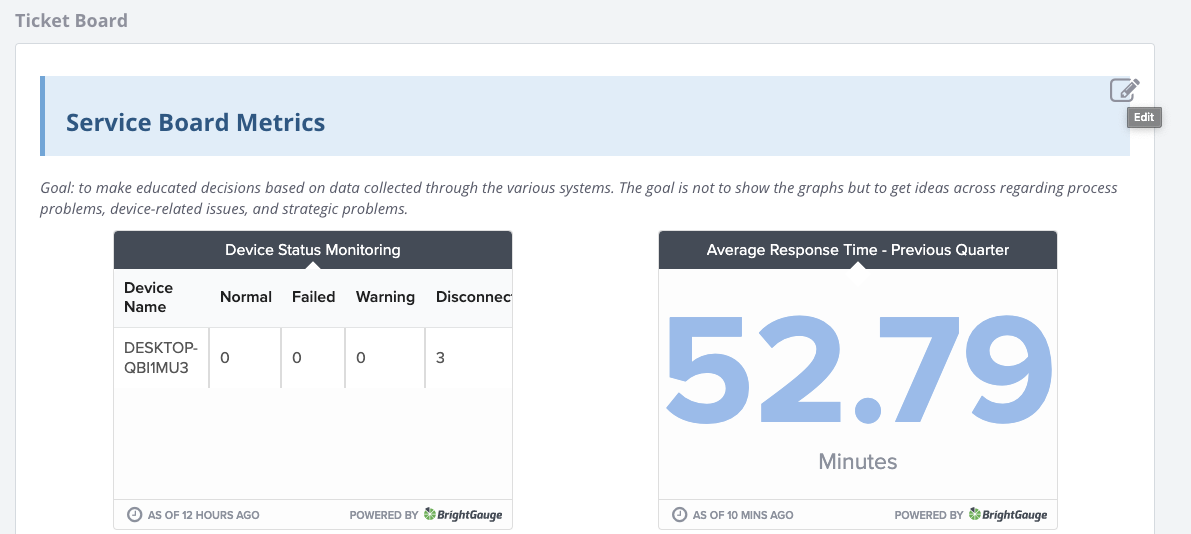
The goal is to be able to get a client's Public Gauge from Brightgauge and embed this into a client report. The end result is embedded gauges showing online BrightGauge data in your reports.
Step 1.
Go to your BrightGauge account and obtain a client-specific Public Gauge embed code or URL
Step 2.
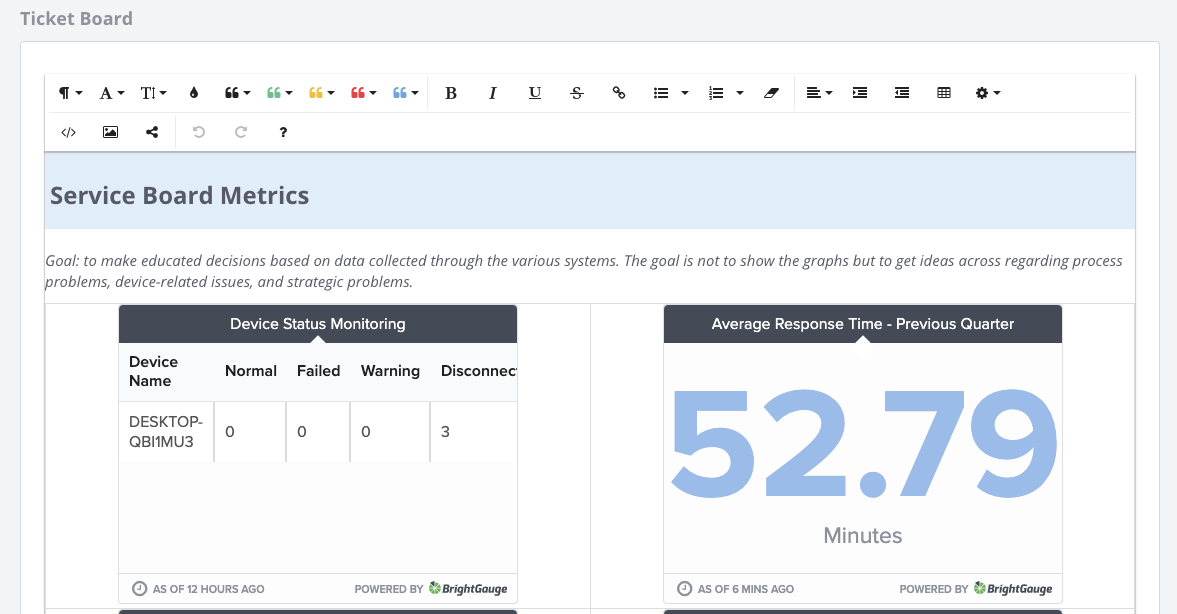
Open and edit an empty content widget, or use the pre-built Ticket Board content widget in your QBR template (part of the Client Meeting Quickstarter Pack)
Step 3.
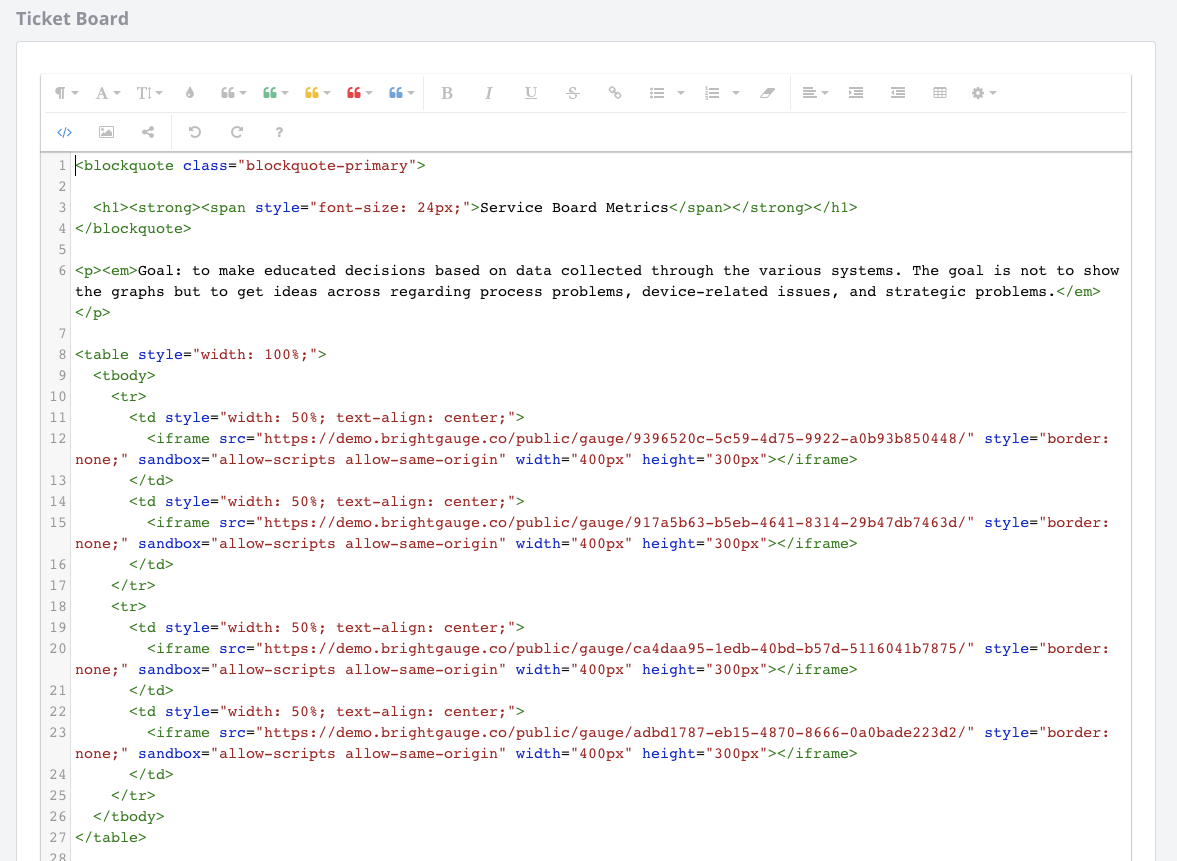
Switch to HTML mode to be able to add the embed code into the report widget. You will see a bunch of code there. Do not be afraid!
Step 4.
Add the following code to your HTML code replacing the URL in the example to your public Gauge's URL
<iframe src="https://demo.brightgauge.co/public/gauge/917a5b63-b5eb-4641-8314-29b47db7463d/" style="border: none;" sandbox="allow-scripts allow-same-origin" width="400px" height="300px"></iframe>
You are able to add multiple gauges into the report by adding them into a table. The following example adds four gauges in one table.
<table style="width: 100%;">
<tbody>
<tr>
<td style="width: 50%; text-align: center;">
<iframe src="YOUR BRIGHTGAUGE PUBLIC GAUGE URL" style="border: none;" sandbox="allow-scripts allow-same-origin" width="400px" height="300px"></iframe>
</td>
<td style="width: 50%; text-align: center;">
<iframe src="YOUR BRIGHTGAUGE PUBLIC GAUGE URLeight="300px"></iframe>
</td>
</tr>
<tr>
<td style="width: 50%; text-align: center;">
<iframe src="YOUR BRIGHTGAUGE PUBLIC GAUGE URL" style="border: none;" sandbox="allow-scripts allow-same-origin" width="400px" height="300px"></iframe>
</td>
<td style="width: 50%; text-align: center;">
<iframe src="YOUR BRIGHTGAUGE PUBLIC GAUGE URL" style="border: none;" sandbox="allow-scripts allow-same-origin" width="400px" height="300px"></iframe>
</td>
</tr>
</tbody>
</table>
Step 5.
Switch back to normal view and save the widget by clicking outside of the widget.
Step 6. - if you made it to a template
Tip:
Follow the steps in one of your Report Templates THEN update the URLs in the Client Reports later.
If you did that in a Report Template you can update your currently live client reports by updating or adding the new widget to the client reports by following this article.