
Get asset management discussions out of the way quickly to spend more time on strategy
Asset management is a boring, time consuming but very important part of client meetings. It is easy to get into the weeds and leave little or less time for more strategic conversations.
Managed Services Platform has been supporting this function by adding asset lists as a spreadsheet, a PDF or an image to a content widget before. However, we realized that we can help get this discussion out the way as quickly as possible and use the limited client facing time for more strategic discussions.
The Asset Management feature helps you to

- Create an Asset Type structure you would like to include to meetings (not to include all assets from configurations)
- Import your assets as a CSV into the platform
- Add the Asset Management Widget to your Reports
- Assign the Assets in bulk to Projects
- Track the Asset Update based on Project Completion
1. Setup the Types
Profile > Client Asset Types. You can set up asset types AND default replacement costs for the assets.
1. We use the default replacement costs to add to imported assets. You will see these in the Asset Management Tab
2. We filter the asset types through the CSV import. Make sure your asset type names are the same as in your PSA/RMM. Through the import we are NOT going to import the types other than those you indicate in the setup.

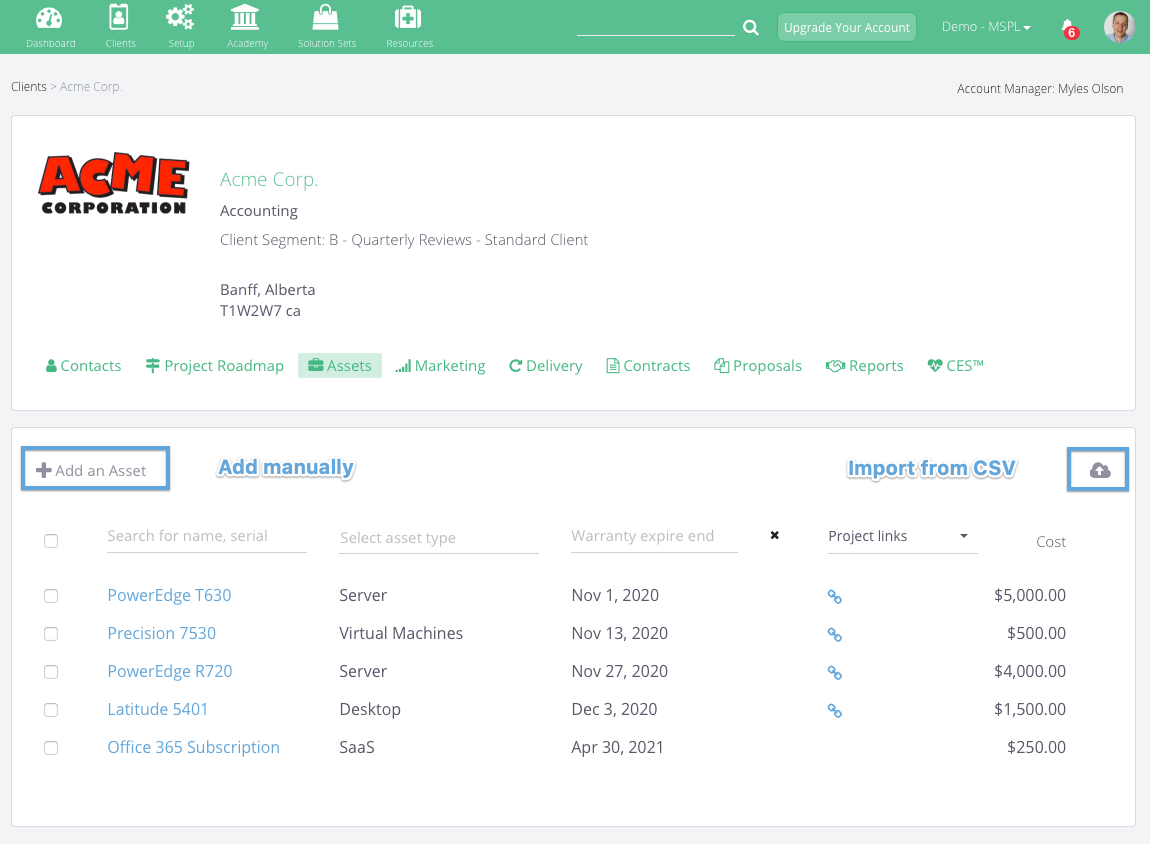
2. Add Assets to a client
You can add assets line by line manually or with a versatile CSV import tool.
We store the following asset attributes:
- Type (filtered if you import)
- Name
- Description
- Serial Number
- Replacement Cost (suggested based on your defaults)
- External Id
- Expiration Date
Currently the uploader supports 3 different formats, which means 3 different set of field names and date formats. In the CSV file, the fields has to be separated by comma and the first row has to be the header.
Supported headers (field names):
Connectwise:
- Configuration Name
- 'Configuration Type' - the values in this field must match the Asset Types configured in the Platform (Client Asset Types)
- Serial Number
- Model Number (this will be the External ID)
- Expires (Date format: DD/MM/YYYY time)
Connectwise Example Import
Autotask:
- [required] Product Name
- 'Configuration Item Type' - the values in this field must match the Asset Types configured in the Platform (Client Asset Types)
- Serial Number
- Reference Number (this will be the External ID)
- Warranty Expiration (Date format: MM/DD/YYYY)
Autotask Example Import
Scalepad:
- Name
- 'Type' - the values in this field must match the Asset Types configured in the Platform (Client Asset Types)
- Serial Number
- Model Number (this will be the External ID)
- Expiry Date (Date format: YYYY-MM-DD)
ScalePad Example Import (converted from the default excel)
Uploading logic for custom CSVs:
There are two required fields:
- the name of the asset (string, can be anything)
- the type of the asset (it is a pre defined list, what can be edited in the Client Asset type).
It is important to add the types to this list before the upload, because those assets will not be inserted, which type is not on the list.
- If there is an unknown colum name, it won't affect the upload process
- A row can be bad, and will not be inserted, if:
- any of the required fields are empty
- or the asset type is not in the list
- or the date format is not good
- If there is a record already in the database with the same "External ID", then it will be updated, not inserted again.
If you are using other systems above, please submit the default CSV file on the chat and we add those to the CSV import, as well.
We are working on native integrations to sync assets from popular PSAs and ScalePad. Until we are crank out the details let's use the manual but versatile CSV import when you do your asset discussions with clients once a year.
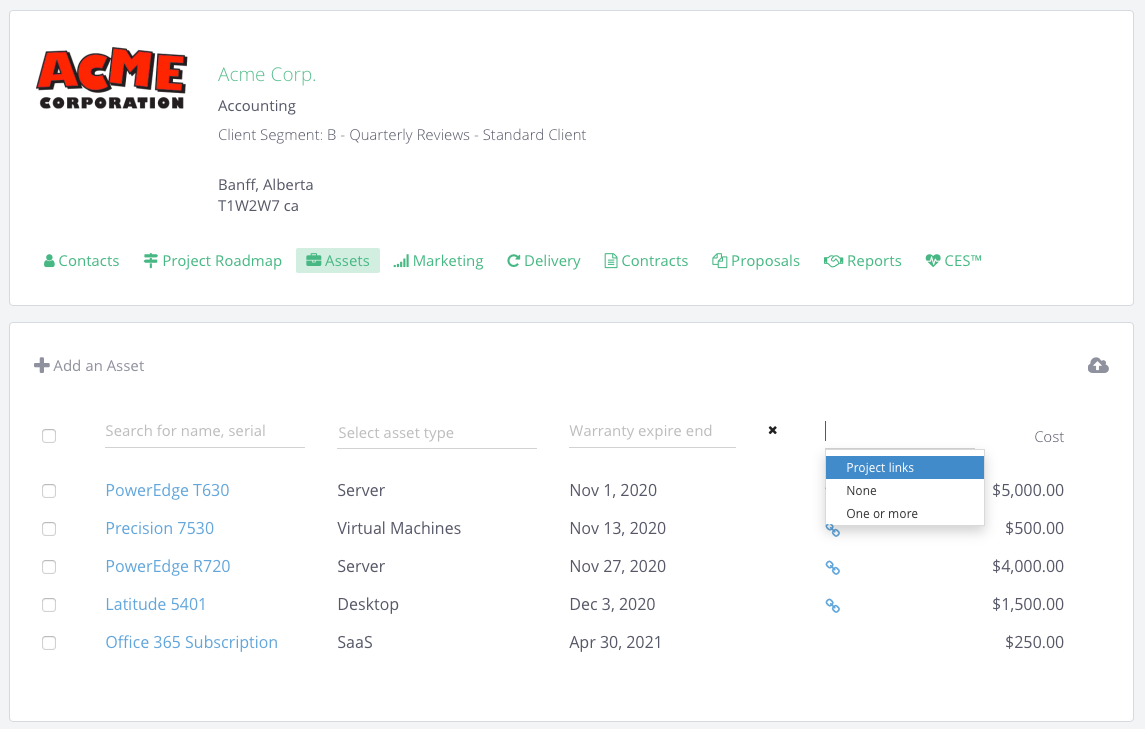
3. Filter Assets
Filter the assets easily by Warranty Date / Type / Name or even whether they're planned for replacement on different projects.
- Filter by Warranty Expiry to show the client the devices will go out of warranty by end of the year for example
- Filter by Project Links to show the client the devices are NOT associated to any replacement project ergo not planned for extension or replacement
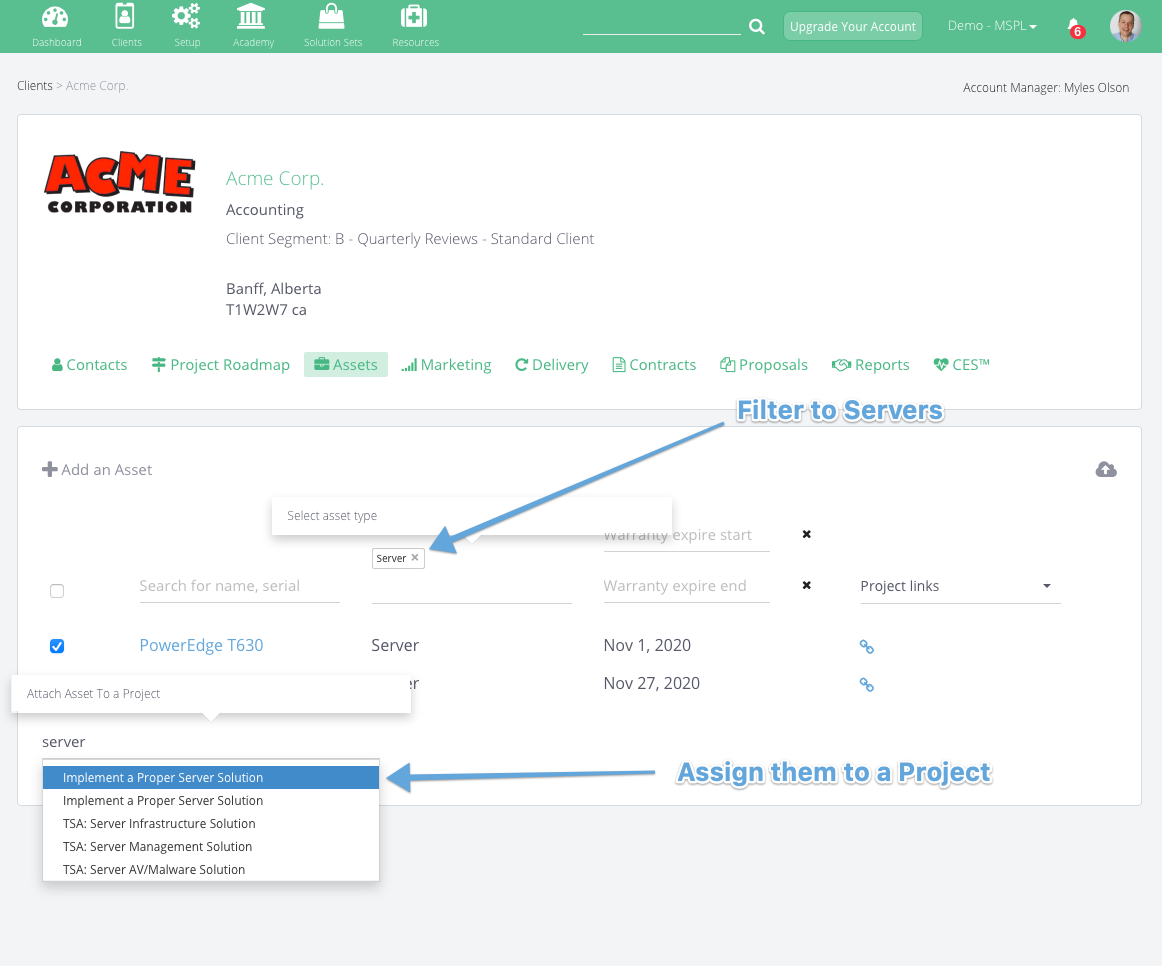
- Filter by Type to show the client the devices per category in order to plan together the replacement or warranty extension
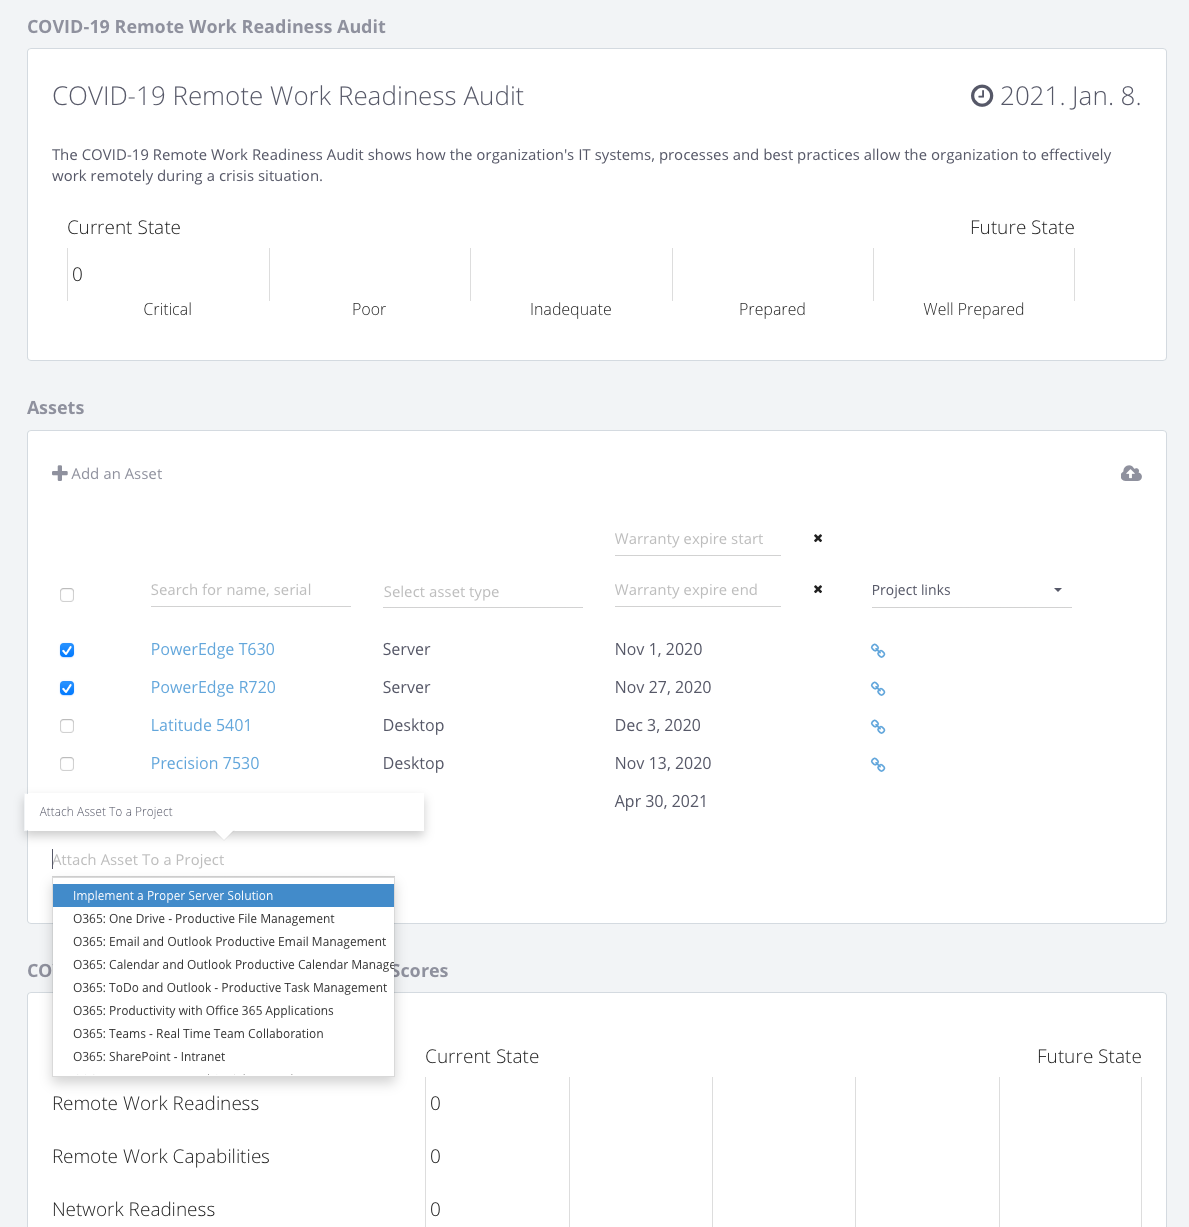
4. Assign Assets to Projects
In order to plan your assets for replacements or warranty extensions you can assign the assets to projects. You can indicate assets are going to be replaced over the current projects or you can make sure all devices are going to associated to a replacement project down the road.This way you can make sure all assets belong to a project on the roadmap.
The replacement cost fields are not going to mapped to a project directly. The goal of the replacement cost is to indicate numbers to clients per category. When you add it to a project you have to add labour costs and other items as well.
5. Get complete visibility
Once you've assigned the assets to a Project they are visible on the Client Project. This is for reference only, to make sure you can follow the assets through the replacement lifecycle.
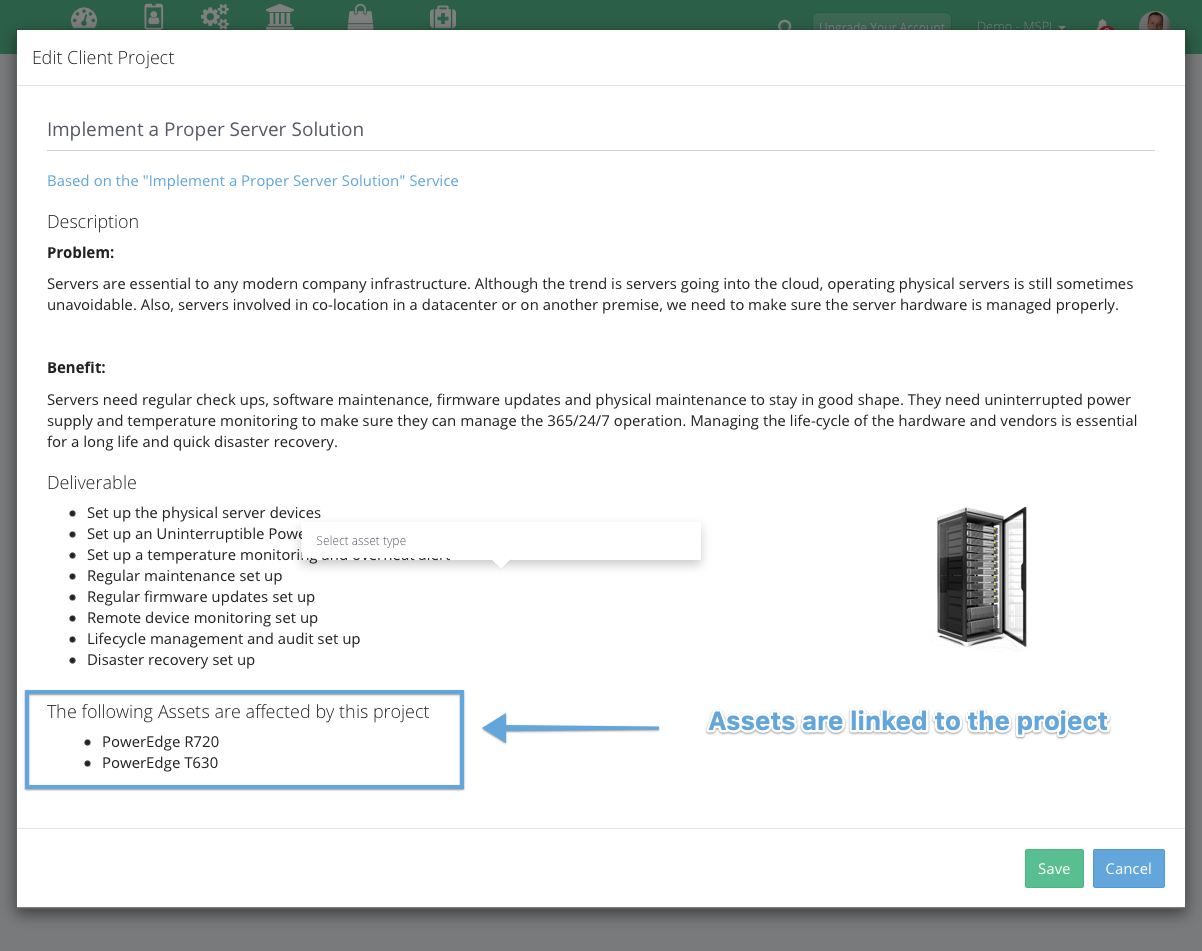
You can always take a glance at which assets are associated with projects (so the replacement is on the roadmap)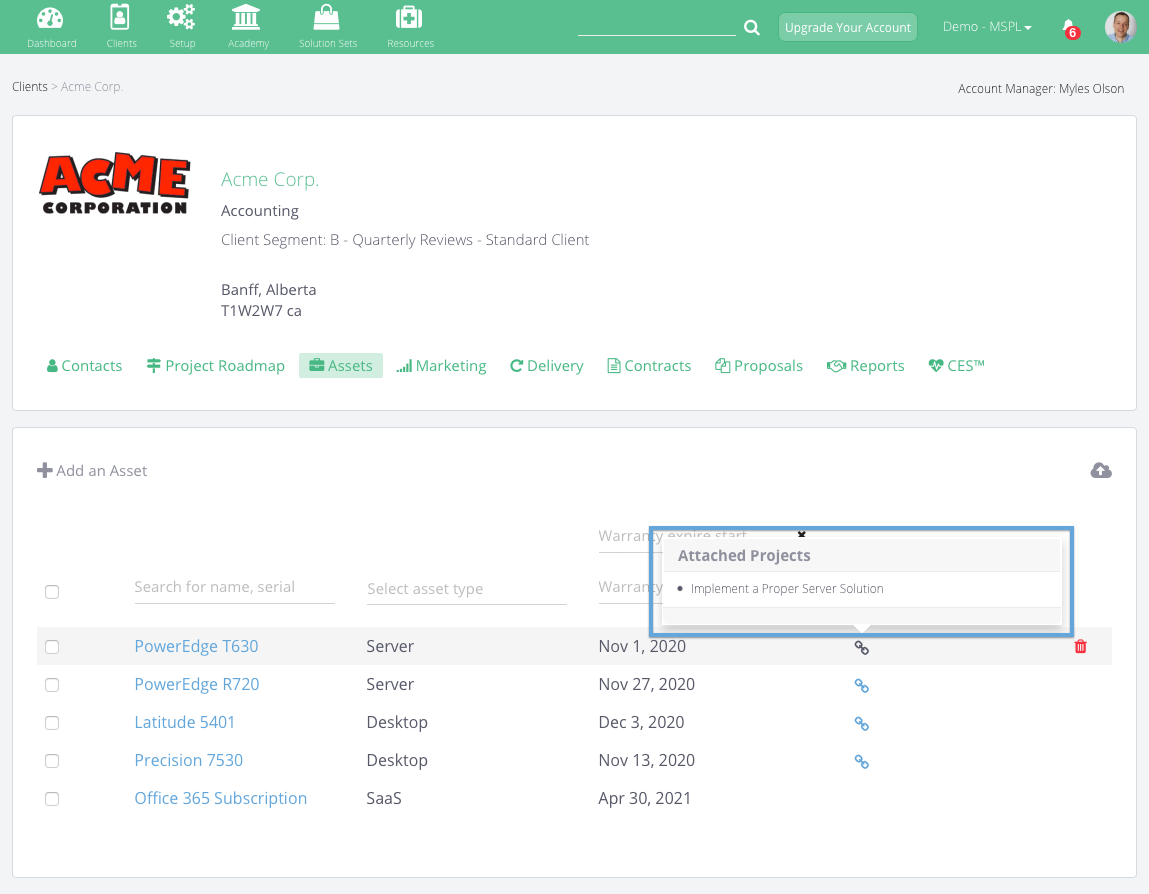
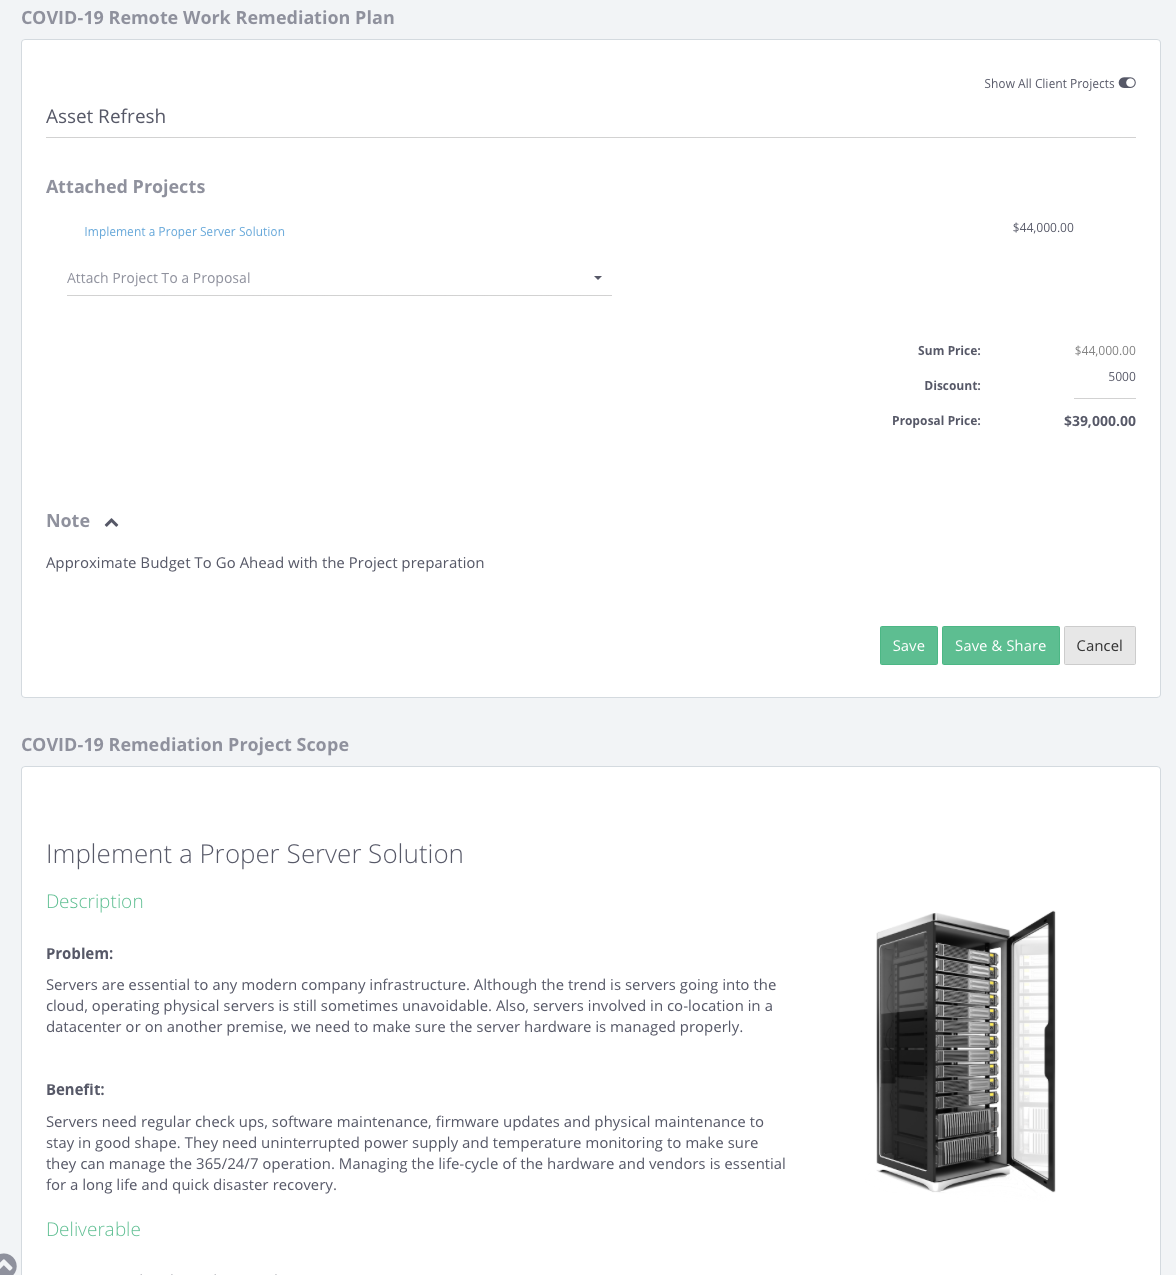
You can also always get a view of which projects are holding associated assets and whether the project proposals are approved by management

6. Save Time with Effective Communication
You can filter, manage and assign assets quickly through meetings.
Use Proposals to get approval of those projects in the roadmap.
Check the article how to handle proposals
Leveraging the asset management function will enable you to spend less time on getting approval of important hardware refreshes and software renewals and gives you more time on strategic conversations.